REVIEW · AMSTERDAM
The Upside Down Museum Amsterdam Admission Ticket
Book on Viator →Operated by The Upside Down Amsterdam · Bookable on Viator
The Upside Down Museum is weird in the best way. It’s a full-on photo playground in Amsterdam, built around upside-down rooms, visual tricks, and a one-way flow that keeps you moving room to room. You’re not studying art history here, you’re making pictures that look like a glitchy dream.
What I liked most is the free digital photo gallery. The museum uses cameras inside the rooms, and your ticket QR code helps trigger self-timed shots, so you leave with souvenir images even if you’re not the world’s best photographer.
One thing to know up front: this is a short experience, and some spots can get cramped or crowded. If you want totally clean, perfectly sharp photos, plan to take lots of your own too, because a few of the built-in camera shots can come out blurry or overexposed.
In This Review
- Key things to know before you go
- The Upside Down Museum Amsterdam: what you’re really paying for
- Tickets, timing, and how to plan for a smooth visit
- Entering the upside-down world: your room-by-room photo route
- Free digital photos: how the QR cameras work and how to beat blurry results
- What the best rooms feel like in real life
- Crowds, pacing, and why early slots pay off
- Who this experience fits best (and who might skip it)
- Food, prints, and what to budget beyond admission
- Getting there with a mobile ticket (and avoiding day-of headaches)
- Should you book The Upside Down Museum Amsterdam?
- FAQ
- How long does The Upside Down Museum Amsterdam take?
- What’s included in the admission ticket?
- Are photo prints included?
- Is the ticket mobile and in English?
- Is the museum near public transportation?
- Can I cancel or change my ticket?
Key things to know before you go
- QR-triggered cameras help produce souvenir photos automatically, and you can download them after
- 25 rooms in 1500m2 means a lot of sets for a relatively quick visit
- One-way route keeps the flow going, but you can’t hop back to earlier rooms
- Ball pits, mirror tricks, and portal tunnels are big crowd magnets (and photo magnets)
- Go early if you want more space to pose and less time waiting for photo turns
The Upside Down Museum Amsterdam: what you’re really paying for
The ticket price is about $31.18 per person, and you should think of it as paying for sets and time, not a long museum visit. This is designed to be fast, playful, and camera-forward. You’re paying to walk into a controlled chaos of scenes where your body position is part of the effect.
Inside, the museum spans 1500m2 across 25 rooms and decors. That’s the heart of the value: you get a lot of different backdrops in about an hour, so your phone fills up quickly. If you’re short on time in Amsterdam but still want a memorable, very shareable stop, this fits well.
Also, the museum builds in a built-for-social setup. You’re given free digital pictures from installed cameras, which adds value beyond what you’d typically get at a normal attraction. Just remember, those camera shots aren’t guaranteed to look like studio portraits every single time. You’ll want your own pics too.
You can also read our reviews of more tours and experiences in Amsterdam


Tickets, timing, and how to plan for a smooth visit

This is one of those attractions that runs best when you book a specific entry slot. You’ll typically want to reserve about 10 days in advance so you can pick the time you actually want. The experience runs about 1 hour, so your slot matters.
The museum offers English, and the ticket is mobile, which is easy on a phone while you’re moving around town. The site is also near public transportation, so you’re not locking yourself into a complicated commute.
The practical tip from the vibe of the place is simple: pick an early time. People who went at the first slot often found the museum feels calmer at the start, with more room to pose. By late morning, the flow can build, and some rooms get tight.
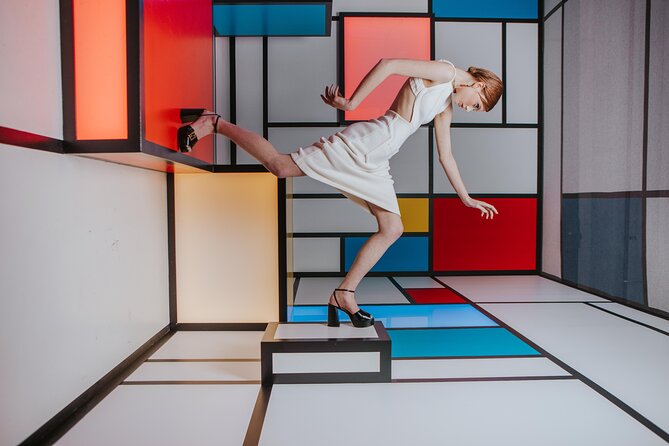
Entering the upside-down world: your room-by-room photo route

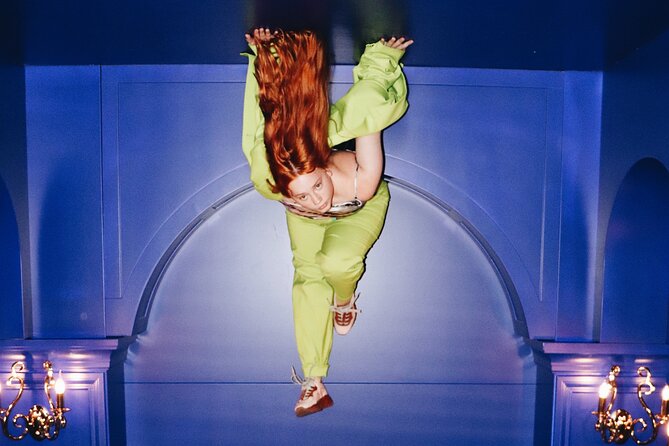
The fun here is that the museum doesn’t feel like a sit-and-stare attraction. It’s built like a route through scenes that are meant to be photographed, including a lot of forced-perspective tricks. You’ll start moving through tunnels and themed spaces, and you’ll keep getting pulled into the next “wait, look at that” moment.
A lot of sets are clearly designed around big, dramatic images:
- Portal tunnels that make it feel like you’re stepping into another dimension
- Upside-down rooms where your perspective makes the scene feel impossible
- Mirror mazes that multiply your pose and mess with what your brain expects
- A heavy focus on the kind of props and scenes that make pictures look intentional, even when you’re just improvising
Then you hit the rooms people tend to talk about most. The giant ball pits are a standout. There are also sets that involve bouncing play—one report specifically called out a trampoline and ball pit combo—so expect areas that kids love and that create more “on-the-spot” moments for photos.
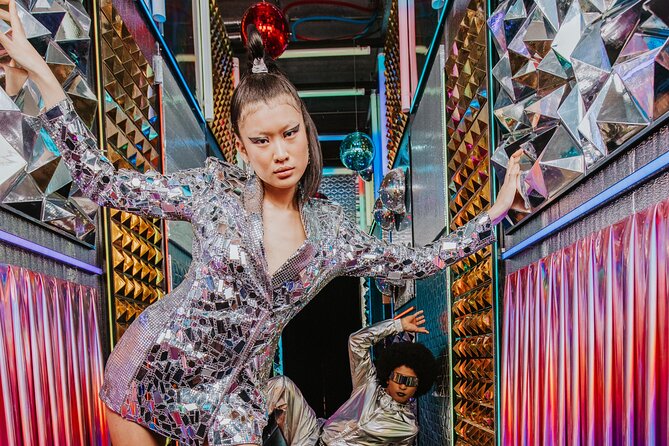
If you like themed realism, you also get a few “this looks like a real place” mini-worlds. One popular sequence includes a metro train-style room with overhead details (including a cat theme), and another set described is an airplane room with drinks and cozy seating. There’s also a club style room and a dressing-up angle that can make the whole thing feel more like play than an exhibition.
There’s also a scene that really lands with younger kids: a giant teddy room that got special praise from a family visiting with a very young child. If your group includes toddlers or early elementary ages, that kind of room is exactly what you want from a playful indoor stop.
Two small rules shape your experience:
1) It’s a one-way experience, so you follow the flow forward.
2) Some rooms can require you to wait for a clean photo setup, because the effect only works if there’s space to pose.
That “no backtracking” part is not a problem if you treat it like an arcade route. If you’re the type who hates moving forward before you’re done, you may feel rushed.
Free digital photos: how the QR cameras work and how to beat blurry results

This museum gives you a souvenir layer most attractions don’t. The key detail is that your ticket QR code is used to trigger self-timed cameras in the rooms. After you finish, you can download the complimentary digital photos from the museum’s installed cameras.
That’s the easy part. The better part is using it smart.
Here’s how you get the best results:
- Take your own photos for the shots you really care about
- Use the museum camera for bonus angles and “perfectly framed by the room” shots
- Keep your phone battery charged, because you’ll be taking lots of images fast
Some people found the museum camera photos a bit bleached, blurry, or not crisp. That doesn’t mean the system is broken—it likely means you’re dealing with motion in play spaces, lighting tricks, and camera timing with a crowd. If you want sharp images, treat the built-in photos like a helpful backup, not the only record of your visit.
One more practical point: if your mobile ticket doesn’t load at the door, don’t panic. There was at least one case where staff still let someone in even when ticket retrieval failed on the phone screen. Still, I’d keep a backup like a screenshot or the booking email in case your phone acts up.
What the best rooms feel like in real life

This place is built on strong “wow” moments. The trick is that the best rooms are the ones that make your body placement matter, not just the ones with decorations.
The spinning tunnel is a good example. It’s funny to watch others go through, but it can also be a little disorienting for you. If you’re sensitive to motion or you get dizzy easily, go in at a comfortable pace and keep your expectations light. It’s meant to be playful, not a fitness challenge.
The ball pit and bounce/play areas often create the biggest reactions because they’re high-energy and visually dramatic. They also change the photo math: the effect looks best when the scene is clear enough for someone to pose. In packed moments, you may spend more time waiting your turn than you expected.
The mirror maze and optical rooms can be great even if you’re not trying hard. Reflections do the work for you. You’ll get multiple images quickly, and you can laugh at how silly some poses look when the reflections don’t match your instinct.
Finally, don’t ignore the quieter rooms. Some sets are less about a big toy feature and more about the “I can’t believe this is real” angle—especially in scenes designed like transport spaces (metro and airplane style rooms). Those are the ones where you can slow down and build a story into your photos.
You can also read our reviews of more museum experiences in Amsterdam


Crowds, pacing, and why early slots pay off
If you only remember one planning tip, make it this: go early. The museum can be popular, and the one-way flow means you can’t easily slow down and redo a scene later. When the museum is busy, it’s more likely you’ll run into crowded photo setups.
People also noted that some rooms can be too cramped when lots of people are lining up for a camera shot. That’s not a safety concern in most cases, but it does affect your ability to get a clean, low-hassle photo.
A good approach is to move steadily but not frantic. Spend enough time in each room to get:
- One main photo you actually like
- One playful shot for fun
- One backup photo using your own camera in case the built-in shot doesn’t turn out
And yes, bring a full phone battery. If you’re trying to capture a whole route in one hour, low battery is the last thing you want.
Who this experience fits best (and who might skip it)

This museum is a strong match for groups that want fun, not a slow-paced museum. It’s especially good for families with kids, including young kids who love interactive play scenes like the ball pit and the teddy room. Reviews also highlight trampoline and ball pit fun, which tells you the physical, playful rooms are a major draw.
Solo visitors can also have a great time. The experience is built for photos, and staff are reported to be helpful with getting pictures in the right spots. If you’re traveling alone and want an attraction where you’re not stuck waiting for someone else to take your photo, this is a good fit.
Adults who love quirky, artsy nonsense can enjoy it too. The whole point is to make you behave like a kid for an hour, with photo setups that reward imagination. One comment praised it for being fun even for adults close to 50, which matches the overall vibe: it’s silly, not snooty.
On the flip side, if you want deep visual effects, extremely polished “high-end” installations, or a longer museum-style experience, this can feel a little short. A few people also compared it to similar optical museums elsewhere and felt it was less advanced. If you’re already an expert in optical photo museums, you may find it more playful than mind-blowing.
Food, prints, and what to budget beyond admission

The ticket includes admission and the complimentary digital photos from installed cameras. Food and drinks are not included, so plan for a separate budget if you want a snack break.
There is a cafe/coffee shop on site and people spoke positively about it. That means you can stay flexible and grab something without leaving. Still, it’s smart to expect extra cost for anything you buy inside.
Photo prints are also not included. If you’re hoping for physical prints, you’ll need to pay extra. The good news is you still get free digital photos, which usually cover the “souvenir” part for most people.
Getting there with a mobile ticket (and avoiding day-of headaches)
Location-wise, you’re in good shape because it’s near public transportation. That makes it easy to fit into a day of walking and transit without adding a long ride.
Since your ticket is mobile, you’ll want your phone ready at entry. I like to keep the ticket screen open a little before you reach the entrance, so you’re not fumbling with apps while you’re near a queue.
If your QR code is hard to pull up, I’d keep a backup plan. Keep booking confirmation handy (email screenshot or saved file), just in case the phone won’t cooperate at the door.
Should you book The Upside Down Museum Amsterdam?
Book it if you want an hour-long, high-photo attraction that doesn’t require planning for complicated tours. It’s great value when you use the included camera photos as a bonus and also take your own pictures. If you’re traveling with kids, this is one of the easier wins in Amsterdam.
Skip it if you’re chasing a longer, more traditional museum experience, or if you’re very picky about photo sharpness. Some people found the built-in photos a bit blurry, and the rooms can get crowded, which can affect how relaxed you feel while posing.
If you’re on the fence, my advice is simple: go early, charge your phone, and treat it like a photo game. You’ll have more fun when you stop trying to “do it like a museum” and start acting like the room is part of the costume.
FAQ
How long does The Upside Down Museum Amsterdam take?
The experience lasts about 1 hour.
What’s included in the admission ticket?
Your ticket includes admission and free digital pictures from the museum’s installed cameras.
Are photo prints included?
No. Photo prints are not included with the ticket.
Is the ticket mobile and in English?
Yes. The experience uses a mobile ticket, and it’s offered in English.
Is the museum near public transportation?
Yes. The museum is listed as being near public transportation.
Can I cancel or change my ticket?
No. The ticket is non-refundable and cannot be changed for any reason.