REVIEW · AMSTERDAM
Amsterdam Photography Masterclass – Private Photography Lesson
Book on Viator →Operated by Aperture Tours · Bookable on Viator
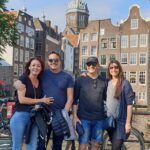
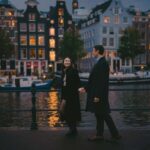
Amsterdam begs to be photographed. This private 3-hour Amsterdam Photography Masterclass pairs a pro photographer with a walk through some of the city’s most camera-friendly corners.
I especially like two things: you get hands-on coaching as you shoot, not just a lecture, and you can pick a daytime or evening session depending on the photos you want. The small private group size also keeps it focused, so your guide can correct your technique in real time.
One thing to consider: you’re expected to bring your own DSLR camera. If you were hoping for hands-on help with a phone camera only, this setup may not be the right fit.
In This Review
- Key highlights worth your time
- A private Amsterdam photo lesson that actually gets you shooting
- Meeting point, pace, and the small-group advantage
- The photo route: nine stops, each built for quick learning
- Stop 1: Amsterdams Lieverdje statue
- Stop 2: Voetboogstraat and Beijbhof de Voetboogsteeg
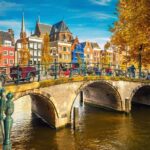
- Stop 3: Leidsegracht bridges
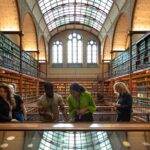
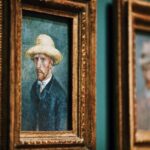
- Stop 4: Rijksmuseum and grounds
- Stop 5: Magere Brug and the Amstel
- Stop 6: Nieuwe Kerk
- Stop 7: Blauwbrug
- Stop 8: Nieuwmarkt
- Stop 9: Huis Bartolotti (Museumhuis Bartolotti)
- Day vs evening: how the class changes your photos fast
- What you actually learn: settings, framing, and shooting smarter
- Price and value: what $204.24 per person buys you
- Who this masterclass suits best (and who might skip it)
- Small practical advice so you get better photos on day one
- Should you book this Amsterdam Photography Masterclass?
- FAQ
- How long is the Amsterdam Photography Masterclass?
- Is this a private tour or a group class?
- What camera do I need to bring?
- Do I need to pay for entry to the stops?
- Can I choose daytime or evening?
- Is the tour canceled in bad weather?
Key highlights worth your time
- Private instruction with a professional photographer and a local guide, max 4 people
- Daytime or evening options for both classic light and low-light shooting
- A shoot-focused route with 20-minute stops at famous Amsterdam spots
- You’ll cover camera settings and real-world framing, including night-photo tips when you choose evening
- DSLR required; camera isn’t provided, and a tripod is only available on request
- Free admission tickets included for the listed stops
A private Amsterdam photo lesson that actually gets you shooting
If you’ve ever stood in front of a postcard scene and thought, I know what I want, but why isn’t my camera cooperating, this kind of class is exactly for you. The format is simple: walk a smart route, stop at major photo targets, and spend the time learning how to turn what you see into what your camera captures.
I like that it’s not a slow museum-style lesson. It’s more like training wheels for the whole trip. You’ll learn the basics from a professional photographer while you’re surrounded by real Amsterdam backdrops, from canal bridges to well-known landmarks.
The class is also practical for your schedule. It runs about 3 hours, and it’s designed to fit into a day that’s already packed with sightseeing. You also get weather coverage because it operates in all weather conditions, so you can plan without waiting for perfect skies.
The only real catch is equipment. You’ll bring a DSLR. No camera is included, and while a tripod can be arranged on request, you’ll still want to show up prepared so your guide can work with your setup instead of pausing to improvise.
You can also read our reviews of more private tours in Amsterdam
Meeting point, pace, and the small-group advantage
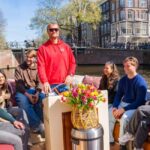
You meet at Leidsekade 97, 1017 PN Amsterdam, and the tour ends back near the same spot. That matters because you can treat this as a “photo block” in the middle of your Amsterdam day, then continue onward without a confusing transit puzzle.
Pace-wise, the structure is built around short, focused sessions. Each stop is about 20 minutes, which keeps the energy up and forces quick decisions. For photographers, that’s a good thing. A shorter stop time pushes you to try a few angles, experiment with settings, and learn what works without spending an hour waiting for the perfect moment.
It’s also truly private: only your group goes, and the maximum group size is 4 people per booking. That small number is one reason the instruction style tends to land. When you can actually hear corrections, you improve faster.
A few more practical notes that help you plan:
- The tour is in English
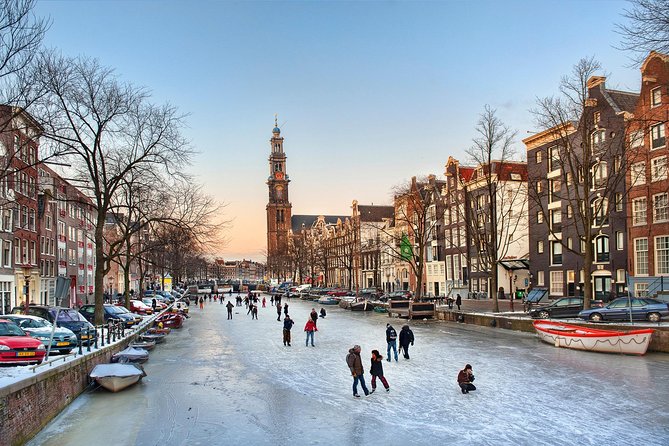
- It runs in all weather, so dress for wind, rain, or cold canal air
- You can use mobile tickets
- Confirmation is received at booking time
- It’s near public transportation
- Service animals are allowed, and most people can participate
The photo route: nine stops, each built for quick learning
This experience uses a classic Amsterdam strategy: shoot where the city’s details show up best. You’ll hit canal views, charming streets, and major landmarks, with the time split into short practice bursts.
You also get free admission tickets at the listed locations, which removes a common hassle when you’re trying to focus on photography instead of ticket math.
Stop 1: Amsterdams Lieverdje statue
The lesson starts with Amsterdams Lieverdje. This statue is a smart first stop because it’s approachable: you can practice working the subject while learning how to control your angle and background.
What I like about starting here is that it’s not all huge architecture. You can experiment with:
- framing your subject with nearby lines
- using the surrounding space to reduce distractions
- learning how your camera focuses and meters in close detail
Possible drawback: because it’s an early stop, you may still be settling in with your camera settings. Give yourself permission to take a few “practice” shots before you start hunting for your best composition.
Stop 2: Voetboogstraat and Beijbhof de Voetboogsteeg
Next is Voetboogstraat, followed by Beijbhof de Voetboogsteeg. Narrower streets like this are great for teaching perspective. You get real opportunities to play with:
- leading lines that pull the eye down the lane
- doorway frames and small depth-of-field effects (if your lens can do it)
- how to keep backgrounds from stealing attention
Short stop time means you’ll want to pre-decide what you’re trying for—portrait-like subject shots, graphic street lines, or something more atmospheric. If you try to do everything in 20 minutes, you’ll end up with a folder of “almost” photos.
You can also read our reviews of more photography tours in Amsterdam


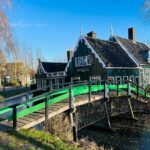
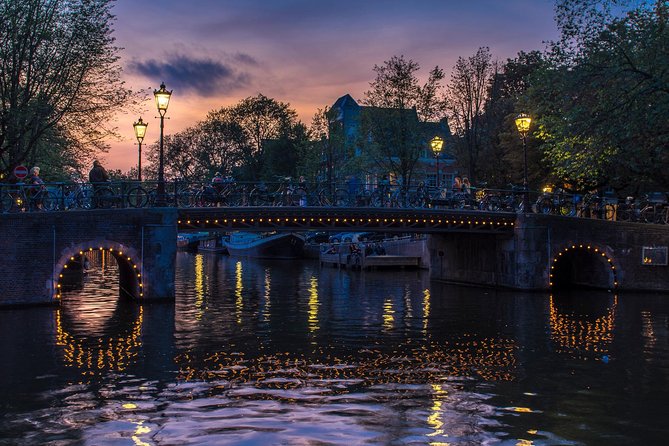
Stop 3: Leidsegracht bridges
Then you move to Leidsegracht, focusing on bridges along the canal. Bridges are a gift for photographers because they naturally create structure: symmetry, repeating shapes, reflections, and clean lines.
Use the bridge area to practice:
- composing with the water and sky as background layers
- shooting at slightly different heights for stronger alignment
- learning when reflection helps and when it just adds confusion
Possible drawback: if the light is changing fast, you might feel like you’re chasing it. Your guide’s job is to help you choose a setting approach that still gives you keepers as conditions shift.
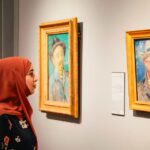
Stop 4: Rijksmuseum and grounds
The route then lands at the Rijksmuseum and its grounds. This is your major “wow” moment, and it’s also a great place to learn how to shoot big landmarks without getting overwhelmed.
Here, you’ll likely focus on:
- capturing the building’s mass with a clean horizon line
- using the grounds to create a sense of place
- getting your camera to handle bright sky and darker architectural areas
The practical issue is time. You only get about 20 minutes, so you’ll want to aim for a few “core” shots: one iconic view, one detail shot, and one composition that uses the surrounding area instead of just the front façade.
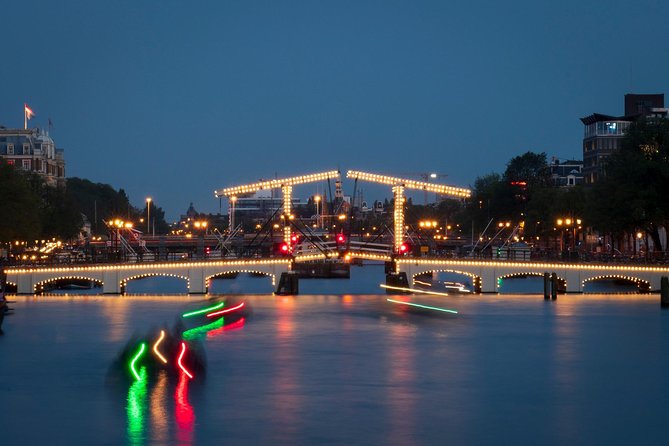
Stop 5: Magere Brug and the Amstel
Next comes Magere Brug, with the Amstel as your backdrop. Bridge-and-river scenes are where photography lessons can pay off fast, because small changes in angle and timing make a huge difference in reflections and contrast.
If your session is during daytime, you’ll likely work on sharp building lines and water texture. If you’re there for evening, you’ll get the added challenge (and opportunity) of low light and darker contrast.
Possible drawback: this kind of shot can tempt you into overthinking. Don’t. Take your main framing, then do two controlled variations. That’s how you learn what your camera is actually doing.
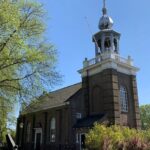
Stop 6: Nieuwe Kerk
The Nieuwe Kerk stop is a strong lesson in architectural focus. Churches and large civic buildings teach you how to manage:
- perspective distortion
- vertical lines that lean or stretch depending on your lens position
- balancing bright stone against darker interior or sky
Because the time per stop stays short, don’t try to photograph every corner. Instead, look for one or two angles where the building looks “straight” and intentional.
Stop 7: Blauwbrug
You then shoot Blauwbrug. Bridges with distinctive color cues are useful for learning color control. You can practice how white balance settings (or your camera’s auto behavior) influences the final look.
Also, because bridges are repeating forms, they’re perfect for testing framing:
- wide shot first to establish context
- mid shot for geometry
- close shot for details
Possible drawback: if you’re not used to architectural angles, you can end up with distorted lines. That’s where a guide earns their pay: they help you see what your camera is exaggerating.
Stop 8: Nieuwmarkt
At Nieuwmarkt, you switch gears a bit toward the square feel of Amsterdam. This is a good place to practice how to photograph a busier public area without turning your images into visual clutter.
In a short time box, focus on isolating:
- one subject area
- one background layer
- one “story” that makes the photo feel intentional rather than random
Stop 9: Huis Bartolotti (Museumhuis Bartolotti)
The final stop is Huis Bartolotti, also called Museumhuis Bartolotti. This is a great finish because it’s a chance to capture details and textures, not just wide scenes.
A good way to use the last stop: aim for a “lesson photo.” Something that shows a technique you practiced earlier—framing, angles, exposure control, or night-photo handling if you’re on an evening session.
If you’re shooting in evening, the last stop is often where people realize what their camera can do under real conditions. It’s also where you’ll want to slow down just enough to avoid rushing your settings.
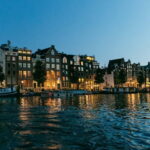
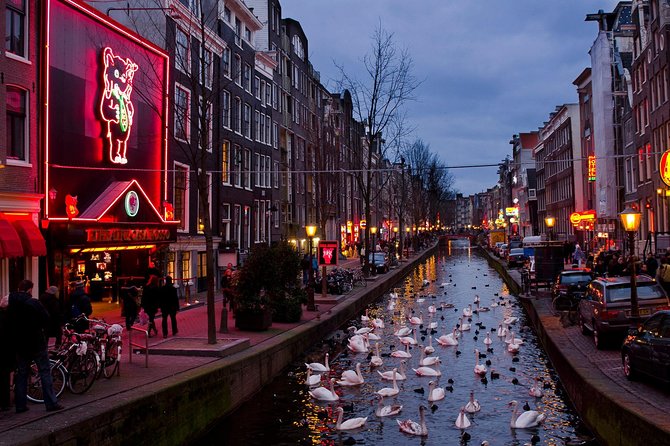
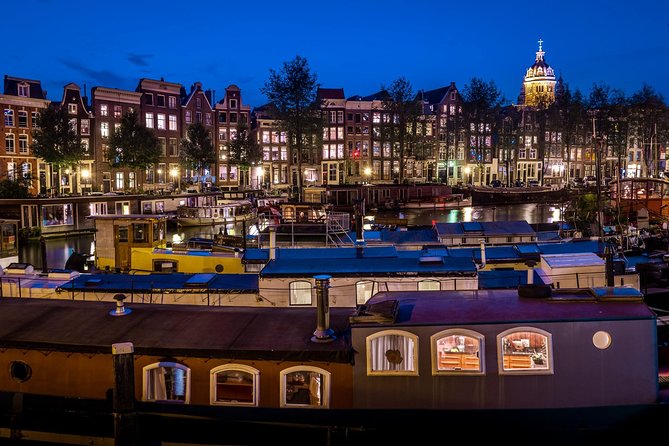
Day vs evening: how the class changes your photos fast
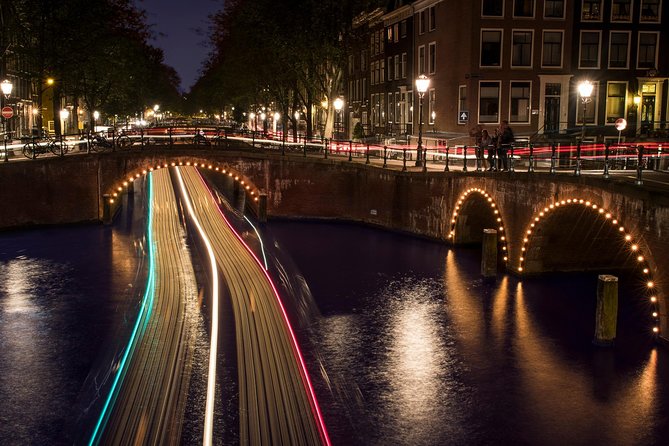
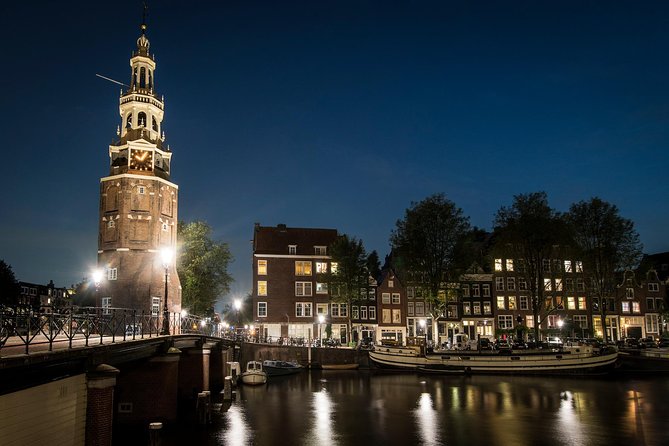
The tour offers a choice between daytime and evening tours, and that decision isn’t just for your schedule. It changes what your camera must handle.
In daytime, you’re usually working with easier exposure and clearer visibility for architectural lines and street geometry. In evening, the emphasis tends to shift toward low-light strategies—how to keep details from turning into noise and how to make night scenes look controlled instead of muddy.
One of the most useful takeaways from this kind of instruction is that night photos often fail for very specific reasons: shutter speed, ISO, focus behavior, and how you frame light sources. I love that the class format gives you time to correct these issues while you’re still standing in the right place, not back at your hotel.
Practical tip for evening shooters: if you want sharper results in low light, it’s worth asking about a tripod available upon request. A tripod won’t fix everything, but it can help your camera do its job while you learn the settings your guide recommends.
And for daytime shooters, don’t ignore the wind and changing light—Amsterdam light shifts fast around canals and open views. The guide’s job is to show you how to keep your camera settings consistent enough that you can learn.
What you actually learn: settings, framing, and shooting smarter
This is a photography lesson, but it’s not just theory. The whole point is that your instructor works with you while you’re shooting.
Here are the practical skills this kind of masterclass tends to build quickly:
- choosing camera settings that fit the scene, not the camera’s default mood
- composing intentionally—using bridges, doorways, and canal lines as structure
- understanding how small changes in angle affect the entire photo
- learning how to handle tricky brightness (bright sky plus darker buildings)
- getting better at seeing photos before you press the shutter
The quality of instruction is a big theme here. I like that the guides are described as polite, patient, and focused on teaching. In particular, I’ve seen names like Renzo linked with helping students learn night photos, and William linked with tailoring the tour to the type of pictures someone wants to take.
That tailoring is important. If you tell your guide you want street-style shots, you’ll get different direction than if you want clean landmark views. The more you communicate what you want your photos to feel like, the more you’ll get out of the stop-by-stop practice.
Price and value: what $204.24 per person buys you
At $204.24 per person for about 3 hours, you’re paying for three things at once: a local guide, a professional photographer guide, and a private, shoot-focused route through major Amsterdam areas.
The value shows up in how much you don’t have to figure out yourself:
- You’re not guessing where to stand for better compositions.
- You’re not reading settings pages for hours and then learning nothing in the field.
- You’re not paying for entry surprises, because free admission tickets are included at the listed stops.
Also, the group limit helps justify the cost. With only up to 4 people, the time doesn’t get swallowed by a big class. You can actually get corrections, and that’s the difference between collecting advice and improving your photos.
If you’re the kind of traveler who likes to get better instead of just collecting photos, this class is a strong match. If you’re a casual shooter who only wants a few scenic pictures with no camera tinkering, you might find the time structure more demanding than relaxing.
Who this masterclass suits best (and who might skip it)
This is a great fit if:
- you have a DSLR and want to learn it properly
- you want clear, practical coaching rather than vague tips
- you like walking and taking photos at the same time
- you care about day or night style, not just one lighting condition
- you want a private session rather than a crowded group workshop
It may be less ideal if:
- you only shoot with a phone (a DSLR is expected)
- you don’t want to spend time adjusting settings and experimenting
- you prefer unstructured sightseeing with no planned stop rhythm
Small practical advice so you get better photos on day one
You’ll get better results if you show up with a plan for your own camera.
Here’s what I recommend before you arrive:
- Know your basic settings: shutter speed, aperture, ISO, and how to change them quickly
- Bring any lens you’ll actually use for architecture and low light
- If you’re doing evening, consider requesting a tripod
- Dress for all-weather walking around canals and bridges
One more thing: the class runs in all weather, so don’t wait for perfect conditions to practice. Learning to shoot through wind or drizzle can actually help you on the rest of your trip.
Should you book this Amsterdam Photography Masterclass?
If you want Amsterdam photos that look like you understood what you were doing, not just that you got lucky with timing, I think you should book it. The format is built for improvement: short stops, real feedback, and lots of chances to test what your guide tells you.
It’s also a smart choice if you like the idea of day and night options. Switching sessions lets you compare how the city looks in different light, and you’ll learn different camera challenges along the way.
If you’re not ready to bring a DSLR and experiment with settings, then maybe keep your money for a self-guided photo stroll. But if you’re willing to try, this is one of the more direct ways to level up your photography while enjoying classic Amsterdam sights at walking pace.
FAQ
How long is the Amsterdam Photography Masterclass?
The session lasts about 3 hours.
Is this a private tour or a group class?
It is private. Only your group participates, with a maximum of 4 people per booking.
What camera do I need to bring?
You should bring your own DSLR camera. Camera equipment is not included.
Do I need to pay for entry to the stops?
Free admission tickets are included for the listed stops.
Can I choose daytime or evening?
Yes, you can choose between daytime and evening tours based on the schedule for your selected date.
Is the tour canceled in bad weather?
No. It operates in all weather conditions, so you’ll want to dress appropriately.