REVIEW · AMSTERDAM
Zaandam: Paint a Perfect Portrait workshop
Book on GetYourGuide →Operated by In de Hoge Hoed creatieve workshops · Bookable on GetYourGuide
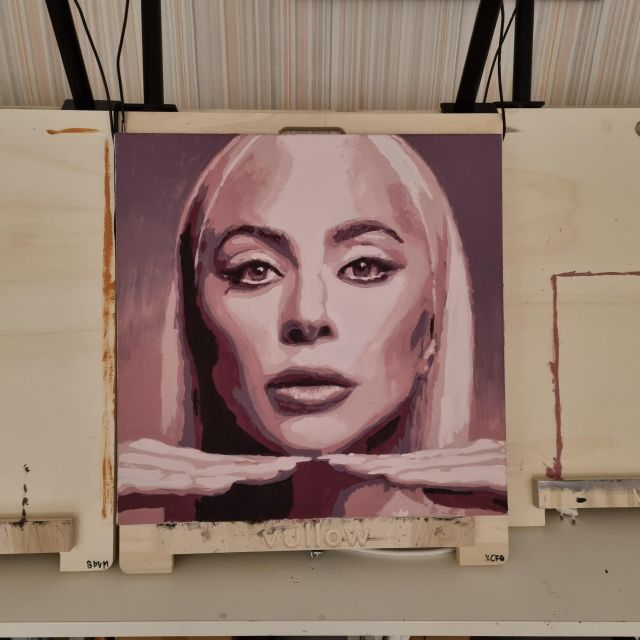
Paint portraits near Zaanse Schans windmills. This workshop is a friendly, hands-on way to create a real-to-hang portrait in just 3 hours, guided step-by-step in a cozy studio. What I really like is the Vullow technique (it’s designed to be approachable, even if you’ve never painted before) and the small group feel (limited to 10). One thing to consider: you’ll need to come prepared with a photo you want to paint, because your portrait starts from that reference image.
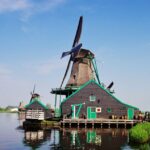
The studio, In de Hoge Hoed, sits in the Zaan region where windmills and canals set the mood before you even pick up a brush. I like how relaxed it feels: you’re given a complimentary drink, an apron to protect your clothes, and a calm space to work at your own pace. Judith, the instructor, is there to guide you without rushing the process, and that matters a lot when you’re learning a technique from scratch.
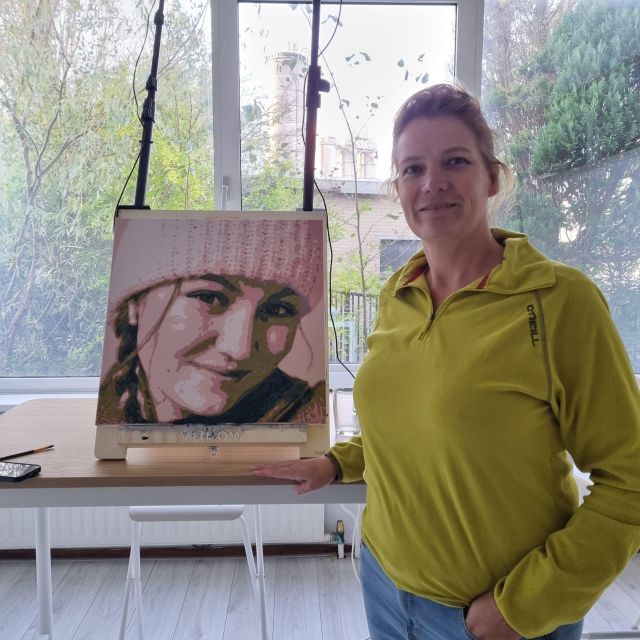
Your final goal is simple: a take-home portrait on a 50 x 50cm canvas that looks like you meant it. You’ll choose your own color combination, paint with acrylics, and get enough coaching to finish with confidence. It’s the kind of activity that turns an afternoon into a personal keepsake or a thoughtful gift.
In This Review
- Key takeaways before you go
- The Vullow technique: portrait painting that actually clicks
- In de Hoge Hoed near Zaanse Schans: setting and getting there
- Meeting point and parking
- Public transport
- Timing tip that helps
- Your 3-hour session, step by step (and what to focus on)
- 1) Arrive, pick your reference, and get set up
- 2) Choose a color combination (this shapes the whole mood)
- 3) Paint on a 50 x 50cm canvas with acrylic
- 4) Instruction when you need it, pace when you don’t
- 5) Finish and take your artwork home
- The canvas, acrylics, and why the result feels gift-worthy
- Materials and drink included
- Small group energy and what Judith’s teaching style means for you
- Music and atmosphere
- Price and value: is $130 fair for a 3-hour portrait workshop?
- Who this Zaandam portrait workshop suits best
- Who might not be the best fit
- Should you book this portrait workshop near Zaanse Schans?
- FAQ
- How long is the Zaandam Paint a Perfect Portrait workshop?
- Where is the meeting point?
- Is there free parking?
- Do I need to bring a photo?
- What size canvas will I paint on?
- What materials are included?
- Is there a drink included?
- Is the workshop taught in English?
- Is the workshop wheelchair accessible?
- What’s the group size?
Key takeaways before you go
- Vullow technique that’s beginner-friendly, so you’re not stuck copying tiny details all day
- 50 x 50cm acrylic portrait canvas with a result you can hang or gift
- Small group limited to 10 people, which keeps the instruction personal
- Cozy studio experience at In de Hoge Hoed, complete with a complimentary coffee/tea/soda
- Bring your own photo reference so your portrait becomes personal fast
The Vullow technique: portrait painting that actually clicks
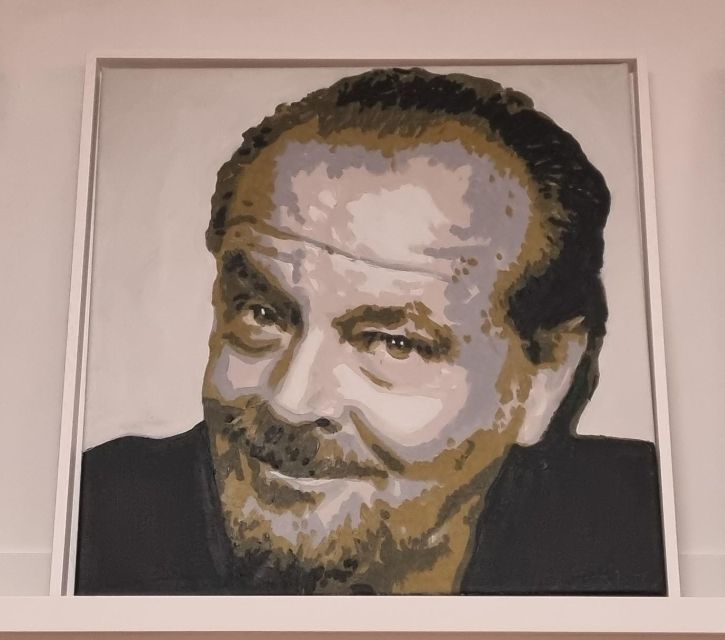
What makes this workshop work is the way the instructor frames the portrait. Instead of turning the session into a stressful lesson about perfect realism, the Vullow technique is taught as a practical process you can follow. You’ll use your chosen photo as the reference point, then build the painting in a way that helps you translate facial features without needing years of training.
A big win here is that the method is described (and demonstrated) as accessible. The results are strong even for first-timers, which is exactly what you want in a short 3-hour class. You get enough structure to get started quickly, plus guidance when something feels unclear. The overall vibe is: relax, paint, and trust the steps.
You’ll also get to make creative choices, especially with color. That’s important because a portrait can look good on two levels: the likeness, and the mood. Even if your painting isn’t a museum masterpiece, choosing colors that match the person’s vibe or your own taste gives the finished piece a personal signature.
You can also read our reviews of more tours and experiences in Amsterdam



In de Hoge Hoed near Zaanse Schans: setting and getting there
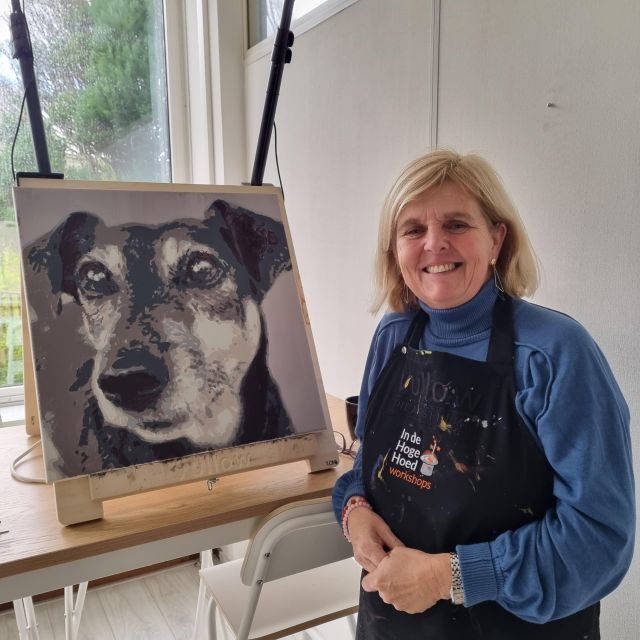
The workshop takes place in the area near Zaanse Schans windmills, but the real action happens in the studio: In de Hoge Hoed. It’s described as a cosy atelier, and that matches what you’ll need for this kind of class—good lighting, a comfortable place to sit, and a calm environment where you can focus.
Meeting point and parking
You enter at the parking lot of Lagendijk 3a of apotheek Groesbeek (pharmacy). The good news: free parking is available there, which is a relief if you’re driving in the Zaan region.
Public transport
If you’re coming by transit, it’s about a 10-minute walk from Zaanse Schans train station, or around a 5-minute walk from busstop Verzetstraat, Koog aan de Zaan (bus 67). That makes the workshop easy to combine with a windmill visit before or after (assuming your timing lines up with your workshop start).
Timing tip that helps
Plan to arrive 15 minutes early. That buffer gives you time to get settled and have your photo reviewed so you can start promptly. In workshops like this, the biggest frustration is losing time before the first brushstroke—arriving early prevents that.


Your 3-hour session, step by step (and what to focus on)
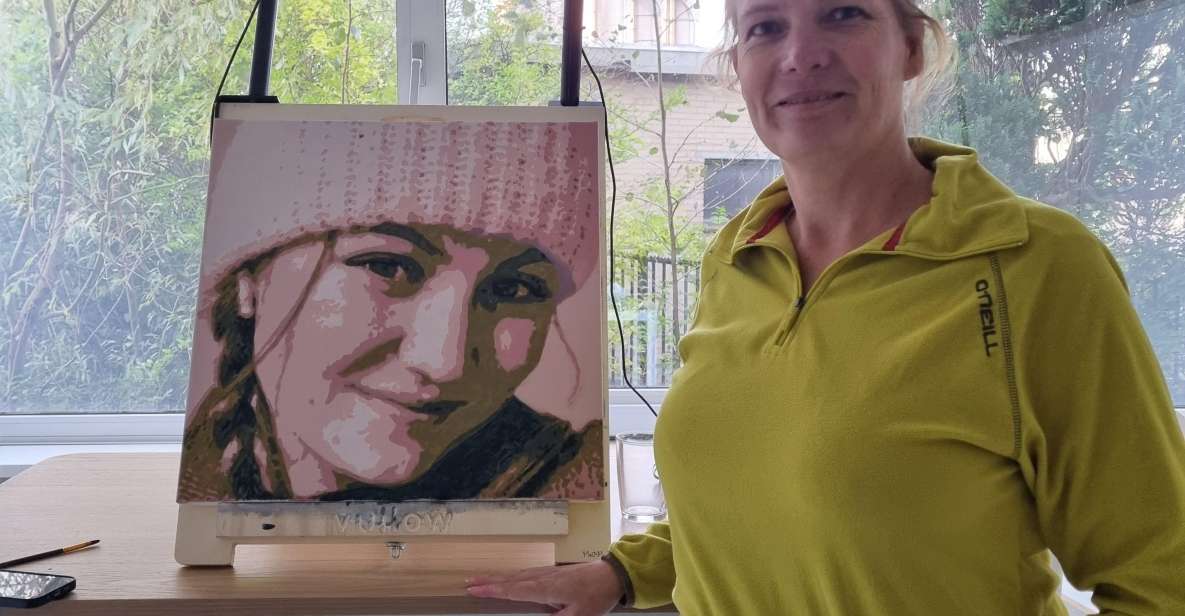
This isn’t a long course. It’s a concentrated 3-hour studio session built around one main outcome: you finish a portrait you’ll be proud to keep.
1) Arrive, pick your reference, and get set up
When you arrive 15 minutes early, you’ll review your photo reference and get started without delays. You’ll have the photo you want to paint, and the experience includes the expectation that you’ll bring your photo and upload it (so bring a copy ready to share). If you’re traveling with photos only on your phone, make sure it’s charged and accessible.
You’ll also be outfitted with an apron to protect your clothes. That small detail matters because acrylic can be messy if you’re not used to it.
2) Choose a color combination (this shapes the whole mood)
Next, you’ll decide on your preferred color combination. This is one of the best parts of the class because it’s where your portrait becomes yours, not just the instructor’s model. If the person you’re painting has warm tones, you might lean into warmer shades; if you want something softer or more stylized, you can choose colors that create that feel.
This choice is also practical. Once you commit to a palette, the rest of the painting becomes easier. You’re less likely to freeze when you’re deciding what comes next.
3) Paint on a 50 x 50cm canvas with acrylic
You’ll paint on a high-quality 50 x 50cm canvas. Working at this size is a sweet spot: big enough to see the portrait clearly, but not so huge that the session becomes impossible.
You’ll use acrylic paints, and you’ll be guided with tips and tricks while you work. Acrylic dries relatively fast, which can be helpful in a short workshop. It also means you’ll want to follow the technique steps carefully so you don’t overwork areas while they’re still setting.
4) Instruction when you need it, pace when you don’t
The instructor support is one of the reasons this workshop gets high marks. Judith is described as helpful, and the teaching style is patient—she takes the time to explain without pushing you through. With only up to 10 participants, you’re not stuck competing for attention.
A practical mindset: treat this as guided practice. If you mess up a small area, that’s part of learning. Focus on progressing through the technique step-by-step and trust that you’ll still finish with a coherent, portrait-like result.
5) Finish and take your artwork home
The workshop ends with you walking away with your finished portrait. It’s positioned as gift-ready or remembrance-ready, and it really makes sense: you’re painting someone specific—an idol, a loved one, or even your pet—so the emotional value is built in from the start.
The canvas, acrylics, and why the result feels gift-worthy
This workshop is designed around a specific product: a portrait on a 50 x 50cm canvas. That size is big enough to look intentional on a wall and substantial enough to feel like a real artwork, not a quick craft.
You’ll also be creating a piece with meaning. Your reference photo could be:
- a loved one
- an idol
- your beloved pet
That personalization is what transforms the class from just learning a technique into creating something you’ll actually want to keep. If you’re thinking about gifting, the timing also works well: you finish the painting before you leave.
Materials and drink included
You don’t need to bring supplies. Acrylic paint, the canvas, and a complimentary drink (coffee, tea, or soda) are included. You’ll also use an apron to protect your clothes. This helps the value feel more solid, because you’re not paying extra for basics.
Small group energy and what Judith’s teaching style means for you
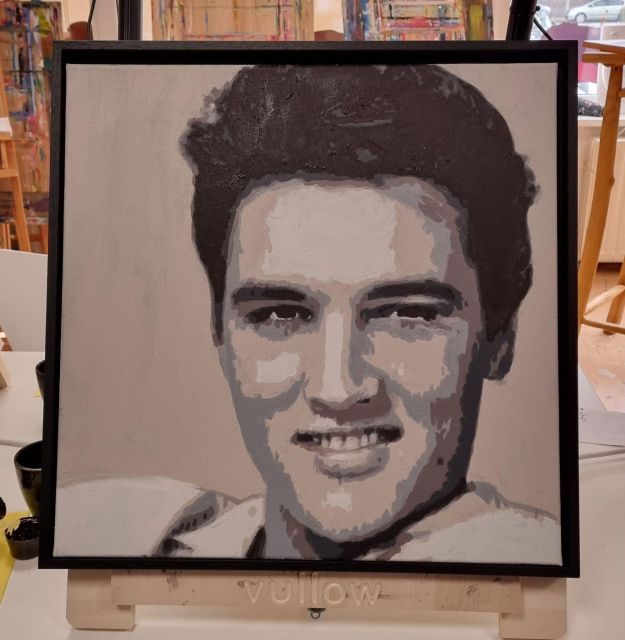
A class with unlimited seats can become a blur. This one is the opposite: limited to 10 participants, which typically means you’ll get more direct guidance when you hit a question or a sticking point.
Judith teaches in Dutch and English, so you can choose what’s comfortable. And based on how the session is described, the coaching style is patient and paced—helpful when you’re a total beginner. Painting portraits is mentally tricky because you’re translating a 2D photo into brushwork, and that takes a little confidence-building.
If you’re the type who worries you’ll slow everyone down, this is a good setup. The class format gives you permission to work through the technique without feeling hurried.
Music and atmosphere
The studio environment is described as having soft, pleasant music. That matters more than you might think. When you’re focused, audio can either distract you or keep you calm. Here, it’s part of the relaxed, cosy feel.
Price and value: is $130 fair for a 3-hour portrait workshop?
At $130 per person for a 3-hour session, it’s not a “cheap activity.” But the value is easier to justify than it looks on paper.
Here’s why:
- You get a large 50 x 50cm canvas and all acrylic paint supplied
- You get a trained instructor guiding you through a specific portrait technique
- You get a take-home finished portrait you can hang or gift
- You get included extras like an apron and a complimentary drink
- You’re in a small group (limited to 10), which supports the teaching quality
In other words, you’re paying for instruction plus materials plus an outcome. If you’ve ever bought supplies for a project only to end up with a half-finished mess, that context matters.
For me, the clearest “value test” is this: if you want a real portrait at the end, with guidance, in just 3 hours, this price stops feeling random and starts feeling practical.
Who this Zaandam portrait workshop suits best
This experience fits best if you want a structured creative activity without a steep learning curve.
You’ll likely enjoy it if you:
- want to paint a specific person or pet and create a meaningful keepsake
- enjoy hands-on arts, even if you’re not a confident painter
- like the idea of a guided technique that gets results fast
- prefer a calm, small-group studio vibe rather than a large classroom
Who might not be the best fit
It’s not suitable for children under 12. Also, if you don’t have a photo reference you’re excited to paint, the experience may feel harder to personalize (because the workshop starts from that reference image).
Should you book this portrait workshop near Zaanse Schans?
If you’re in Zaandam and you’d rather create something than just watch it, I’d book it. The biggest reason is the combination: a short 3-hour format plus a technique that’s taught to be workable for beginners, plus a finished product on a 50 x 50cm canvas that you’ll actually want at home.
Book this if you want a meaningful gift or a personal remembrance, and if you’re happy showing up with a photo ready to use. Skip it only if you’re looking for something purely sightseeing-focused, or you’d rather not commit to painting from your own reference image.
FAQ
How long is the Zaandam Paint a Perfect Portrait workshop?
The workshop lasts 3 hours.
Where is the meeting point?
You enter at the parking lot of Lagendijk 3a of apotheek Groesbeek (pharmacy).
Is there free parking?
Yes. You can park your car for free at the meeting area.
Do I need to bring a photo?
Yes. You should bring your photo of the person, idol, or pet you want to paint, and you’ll select/upload it before you start.
What size canvas will I paint on?
You’ll paint on a 50 x 50cm canvas.
What materials are included?
The workshop includes acrylic paint, the 50 x 50cm canvas, an apron, and a complimentary drink.
Is there a drink included?
Yes. You’ll get a coffee, tea, or soda.
Is the workshop taught in English?
Yes. The instructor can teach in Dutch and English.
Is the workshop wheelchair accessible?
Yes, it’s wheelchair accessible.
What’s the group size?
It’s a small group limited to 10 participants.