REVIEW · HAARLEM
2 Hours Walking Tour Throughout History & Highlights of Haarlem
Book on Viator →Operated by 360 Haarlem Tours · Bookable on Viator
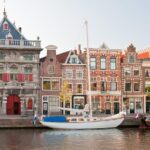
Haarlem history shows up in plain sight. This 2-hour walking tour gives you quick orientation, with a friendly local guide and stops tied to how the city grew along the river and through big moments of war, trade, and daily life. I love the small group size (15 or fewer), because questions feel possible and the pace stays human. I also like how the route links landmarks you can see right now—like Grote Markt and the Spaarne river—to stories that explain why Haarlem looks the way it does.
One thing to consider: this is an “outside-and-explain” walk. You won’t go inside attractions, so if you want museum time or church interiors, you’ll likely need to add that separately.
In This Review
- Key highlights to look forward to
- Two hours that get you oriented fast in Haarlem
- Meeting at Lepelstraat 3 and grounding at Grote Markt
- Grote Markt: Spaarne River, Peter Teyler, De Waag, and Haarlem beer
- Amsterdamse Poort, Haarlem’s sygil, and the siege era
- De Koepel: old structures, new uses
- Catharijnebrug and Molen De Adriaan: reconstruction after setbacks
- The Hofje concept, Waalse Kerk, and a careful look at harder chapters
- Corrie Ten Boom: remembrance with city context
- No attraction entry: how that changes your expectations
- Price and value: $25.68 for a guided orientation walk
- Who should book this Haarlem highlights tour
- Should you book this Haarlem highlights walking tour?
- FAQ
- What is the duration of the Haarlem walking tour?
- Where does the tour meet and start?
- Where does the tour end?
- How much does the tour cost?
- Is the tour in English?
- How big is the group?
- Does the tour include entry into attractions?
- Do I need an admission ticket for the stops?
- Is the tour suitable for moderate walkers?
- Are service animals allowed?
- Can I cancel for a full refund?
Key highlights to look forward to
- Small-group pace with up to 15 people, so you can actually hear and ask
- Grote Markt as your anchor, with the tour meeting and finishing there
- Spaarne river stories, including Peter Teyler and Haarlem’s beer-brewing tradition
- Windmill and bridge history, with Molen De Adriaan and Catharijnebrug in the mix
- Hofje and Waalse Kerk context, including how buildings and communities changed use over time
- Corrie Ten Boom stop, adding a powerful remembrance layer to the walk
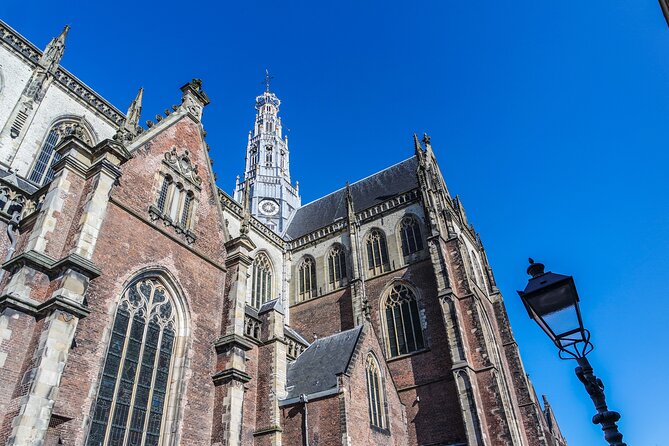
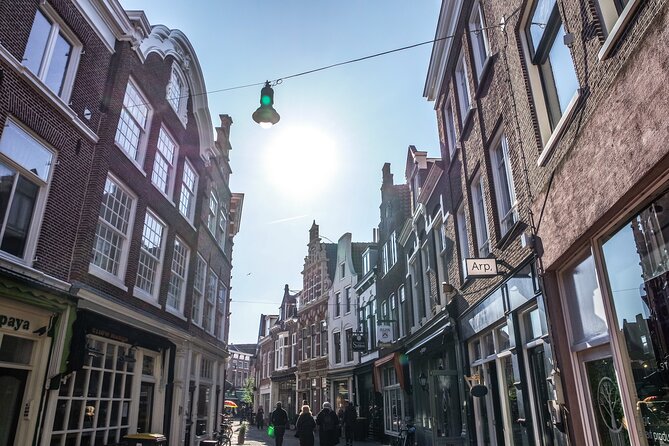
Two hours that get you oriented fast in Haarlem
If Haarlem is your first time in the city, you can waste time wandering. This tour helps you avoid that. In about two hours, you walk from the historic heart around Grote Markt into the areas that shaped Haarlem’s power and identity: the waterways, the old gates, the reused buildings, and the religious spaces with complicated histories.
The biggest practical win is timing. A 2-hour loop isn’t a big commitment, but it’s long enough for your guide to connect dots. You start noticing patterns: where people traded, where they built civic structures, and how the city adapted when technology, faith, or politics shifted.
Also, the “small group” rule matters more than you might think. With a max of 15 travelers, you’re less likely to feel lost behind the crowd, and you have a better shot at hearing the guide clearly while you’re walking and stopping.
You can also read our reviews of more walking tours in Haarlem


Meeting at Lepelstraat 3 and grounding at Grote Markt
The meeting point is Lepelstraat 3, 2011 RD Haarlem. The guide meets you at the Grote Markt about 15 minutes before the tour start. That early meeting window is useful: you can get oriented, find your spot in the group, and settle before the walking begins.
From there, the tour uses Grote Markt like a compass. You start with the square and end back there. Even if your legs get tired, you finish where you began, which makes it easier to plan your next stop for food or a self-guided wander afterward.
One small tip that’s worth your attention: stand where you can hear. A couple of past guests noted that one guide spoke very softly at times. If that happens with your guide, you’ll benefit from staying closer to the front rather than drifting to the edges.
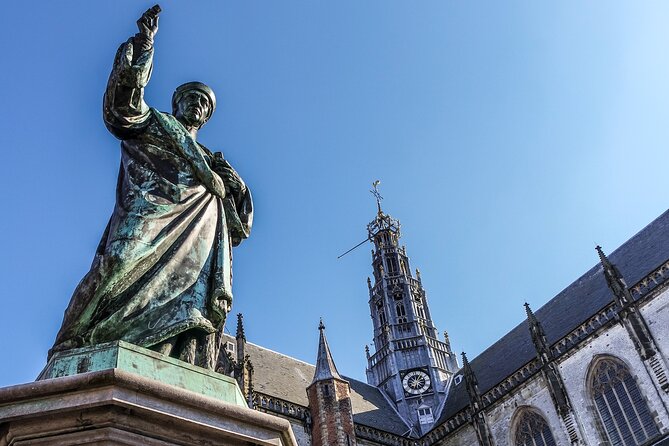
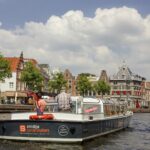
Grote Markt: Spaarne River, Peter Teyler, De Waag, and Haarlem beer
Grote Markt is more than a pretty square. Here, your guide sets the tone for Haarlem’s story—especially the role of water and commerce.
You’ll spend about 20 minutes at the start, then more time tied to the first major cluster of sights. The Spaarne river comes up early, and it’s not just for views. The river helped shape Haarlem’s economy and layout. When you understand the river, streets and building choices start to make sense fast.
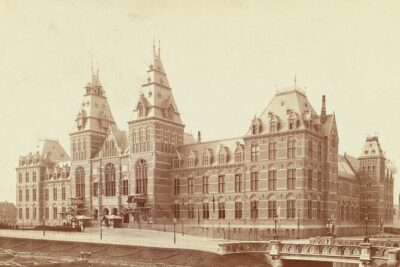
You’ll also hear about Peter Teyler and Teyler’s Museum. Even if you don’t step inside, the guide’s explanation can help you place Teyler as a figure connected to learning and civic pride. That context is handy for deciding whether you want to return later for a museum visit.
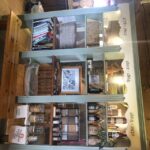
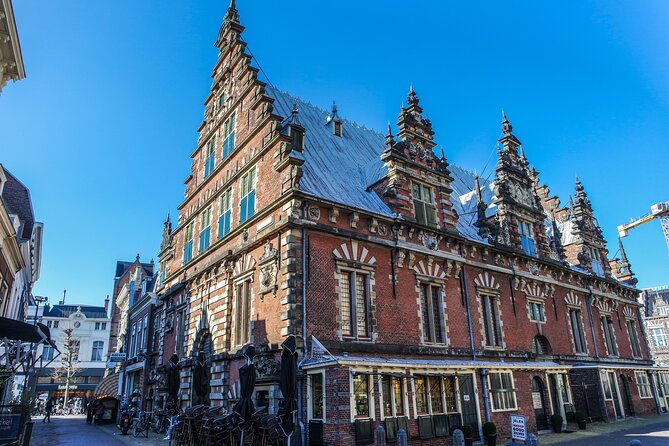
Next up is De Waag, which signals how Haarlem handled weighing, trade, and civic organization. Alongside that, you’ll get the story of Haarlem’s beer brewing tradition. For beer lovers, this is one of those “oh, that’s why” moments. Haarlem isn’t only about canals and brick buildings—it’s also about craft industries that grew over time.
What I like about doing these themes at your first stop: you leave the square with a mental map. You stop seeing Haarlem as random buildings and start seeing it as a city built around practical lifelines—water, trade, and local production.
Amsterdamse Poort, Haarlem’s sygil, and the siege era
After the Grote Markt foundation, the tour turns toward power and conflict. You’ll spend about 15 minutes on the Amsterdamse Poort’s history, plus Haarlem’s sygil (city seal) and the 5th Crusade and siege of Haarlem.
This is a great segment for history buffs because it’s compact. Instead of a lecture that eats half your day, you get the key connections: the gate as a symbol of defense and movement, the seal as identity, and the siege as a reminder that even important cities weren’t protected from dramatic change.
One caution: this is still a walking tour with brief stops, and the tour does not include entering buildings. So if you want to unpack every detail of the Crusade or the siege with sources and artifacts in hand, you might feel you’re skimming. On the other hand, if you like getting your bearings and then choosing what to explore later, this timing works well.
De Koepel: old structures, new uses
Next is De Koepel, around 10 minutes. The guide focuses on the building’s history and its current use, plus how repurposed buildings show up across the Netherlands.
This stop is valuable even if architecture isn’t your main hobby. It gives you a lens for reading the city. Haarlem (like much of the country) often keeps older shells while changing what happens inside. That means you’ll see a brick form that looks centuries old, but you’ll also notice modern functions adapting to fit it.
A quick practical payoff: after De Koepel, you’ll start spotting “re-use logic” in other buildings too. That makes a future self-guided walk more rewarding, because you’re no longer just taking photos—you’re interpreting what you see.


Catharijnebrug and Molen De Adriaan: reconstruction after setbacks
At Catharijnebrug, you’ll spend about 15 minutes. This segment ties the bridge to the history of Molen De Adriaan, including its reconstruction and current use.
Bridges and mills are both working symbols. They point to how Haarlem kept moving goods and how it managed the physical realities of living in a place shaped by water. The reconstruction story adds another layer: cities change, buildings get damaged or updated, and the community decides what must be rebuilt.
If you’re the type who likes your history with a little cause-and-effect, this is one of the stops that tends to click. You see a structure, you hear why it exists, and you understand what it represents today.
The Hofje concept, Waalse Kerk, and a careful look at harder chapters
Then comes a more sensitive portion of the route. You’ll spend around 10 minutes on the hofje concept, the uses and reconstructions of the Waalse Kerk, and Haarlem’s so-called redlight district connection.
This segment matters because it shows how religious and social spaces can shift roles over time. You’re not just hearing dates—you’re getting a sense of how neighborhoods evolve based on economic pressure, law, and social needs. The “hofje” idea also helps explain a distinctive Dutch way of providing sheltered community life in a compact setting.
It’s short, but it’s meaningful. The drawback here is also the reason it’s kept brief: this is not a deep dive into morality or vice. It’s context, focused on the places and what changed. If you want a longer discussion, you’ll need to follow up on your own after the walk.
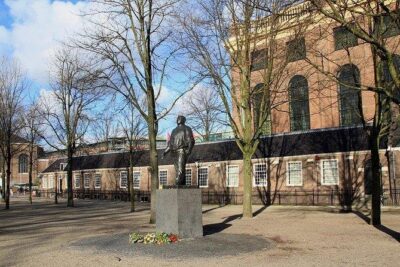
Corrie Ten Boom: remembrance with city context
The tour includes Corrie Ten Boom, with about 15 minutes at this stop. This adds a remembrance element to the route and helps balance the more civic-and-economic themes you saw earlier.
Even without museum entry, a guided stop can put a person into the city’s physical geography—showing you that Haarlem’s story isn’t only about architecture. It’s also about real people living through difficult times.
If you like tours that don’t just point at landmarks, this part is often the emotional anchor that makes the walk feel complete.
No attraction entry: how that changes your expectations
You won’t enter attractions on this tour. That’s actually good news for many first-timers. You’re not waiting in lines or losing time inside spaces you might later decide aren’t your thing.
But you do need to set expectations. If your dream Haarlem visit includes indoor views—church interiors, museum collections, guided exhibits—this experience won’t satisfy that alone. Instead, it acts like a filter. After the tour, you’ll likely know what you want to see up close.
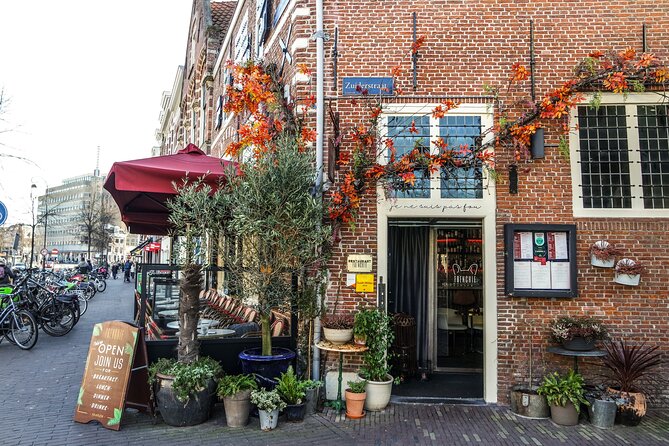
A practical approach: treat this walk as your pre-game. After you finish back at Grote Markt, choose one add-on that matches what sparked your interest—river/architecture themes, civic history, or a deeper stop on the most compelling figure your guide highlighted.
Price and value: $25.68 for a guided orientation walk
At $25.68 per person, you’re paying for a local guide and structured storytelling over about two hours. The value is strongest if you want context while you’re still learning where things are in Haarlem.
You’re also getting a small group experience, not a giant bus-style crowd. That makes the guide’s explanations more usable. And since the tour doesn’t require attraction entries, you’re not juggling extra fees or waiting around.
You’ll feel the best value if you:
- enjoy history when it connects to places you can see
- want to return later with a sharper sense of what matters
- like walking short distances with stops instead of museum-only afternoons
If you only want sights with zero backstory, a self-guided walk could be cheaper. But if you want the “why” behind Haarlem’s streets, the price is fair for the time and guidance.
Who should book this Haarlem highlights tour
This tour is a strong fit for:
- history buffs who like a practical overview
- first-time visitors who need orientation without a long day
- people who prefer small groups (15 or fewer)
- anyone who wants to hear about Haarlem’s river trade, beer brewing tradition, city gate history, and a few memorable human stories like Corrie Ten Boom
It may not be your best choice if you want:
- lots of time inside buildings
- a louder, high-energy style presentation
- a Q-and-A experience where every question gets very detailed answers
One more practical note: bring comfortable walking shoes. Even with frequent stops, you are out for a couple of hours on foot.
Should you book this Haarlem highlights walking tour?
I’d book it if you want a smart first look at Haarlem that turns your later wandering into something you can actually interpret. The structure is simple: Grote Markt at the start, key historic areas in between, then back to the square—about two hours with a guide who can make the walk feel quick.
I’d think twice if you’re chasing indoor time, museum depth, or a tour that stays loud and easy to hear at all moments. Given that some guides have been noted as speaking softly, you’ll want to position yourself near the front.
If your goal is to leave Haarlem with a mental map plus a handful of stories you can’t forget, this is a good match.
FAQ
What is the duration of the Haarlem walking tour?
The tour lasts about 2 hours.
Where does the tour meet and start?
The start location is listed as Lepelstraat 3, 2011 RD Haarlem, Netherlands. The guide meets you at the Grote Markt about 15 minutes before the tour starts.
Where does the tour end?
The tour ends back at the meeting point.
How much does the tour cost?
The price is $25.68 per person.
Is the tour in English?
Yes, it is offered in English.
How big is the group?
The tour has a maximum of 15 travelers.
Does the tour include entry into attractions?
No. The tour does not enter any attractions.
Do I need an admission ticket for the stops?
The stops are listed with free admission, and the tour is built around viewing and walking rather than ticketed entry.
Is the tour suitable for moderate walkers?
It requires moderate physical fitness since it is a walking tour.
Are service animals allowed?
Yes, service animals are allowed.
Can I cancel for a full refund?
You can cancel for a full refund up to 24 hours in advance of the experience’s start time.